This is the multi-page printable view of this section. Click here to print.

Return to the regular view of this page.

Injection guide

This section concerns both transmasculine and transfeminine people, who use injections for their HRT. Injection is the most common route of administration for testosterone, whereas injections of estrogens - since unavailable through prescription in many European countries including Sweden - is mostly used in the frame of DIY HRT.

Testosterone is administered by Intramuscular injections

Estrogens are given through both Intramuscular and Subcutaneous injections.

Syringes and needle business (size, gauges…)

Performing injections necessitate some materials, and most obviously syringes. We distinguish the syringe (the pump, consisting of the barrel and plunger), and the needles.

The syringe and the needles often come separated, that is the needle being detachable from the syringe. This allows for a change of needles, not in order to use the same syringe over several injections, but to facilitate the process of one same injection; indeed, depending on the viscosity of the product you’ll inject, you could need/prefer one needle to draw the product easily from the vial, and another needle for the actual injection, that will limit the pain, or facilitate the mode of injection (IM or SC).

For the syringe itself, pay attention to the measurement unit: mL or cc. If conversion is possible, it is easier for both testosterone and estrogen injections to measure in mL.

The size of the syringes depends on the amount of product you need to inject at a time. For Nebido injections, you’ll usually need to inject 4ml every 2 to 3 months, which is a pretty big amount. The syringe must consequently be able to fit 4mL or slightly more than 4mL. For Androtardy, you usually perform more frequent injections, but with much lesser product (0.25-0.50mL). Don’t use an overly big syringe for small amounts like these, as precise measurement will be difficult. Injections of estrogens usually come with small amounts as well (from 0.1ml); a 1ml syringe is usually quite enough.

What matters for the needle is the length and gauge..

The length will determine how deep you can go: you need longer for IM, and shorter for SC:

  • 1 inch to 1.5 inch is usually recommended for IM.
  • ½ inch to ⅝ inch is usually recommended for SC.

The Gauge is the measurement unit for the diameter/thickness of the needle. The bigger it is, the easier and faster the liquid is dispensed, but the higher the pain. A small gauge means thicker needle, and a high gauge means thinner needle. The choice will depend on how much liquid you need to inject. The Gauge measurement comes with an international color coding (each gauge a color), and it spreads from 7G (the largest) to 33G (the thinnest). As a point of reference, the needles used for drawing blood for a common blood test are usually 21G.

  • If you need to inject a lot (like 4mL of Nebido), you might want to choose a smaller gauge (20 to 22G) in order to have the liquid injected faster, even if it means more pain at the injection. A long and slow injection can end up being more painful.

  • For small amounts (1ml and less), you may consider a higher gauge (25 to 30). Keep in mind that there is a length-gauge ratio, and performing IM injection with a longer needle will also mean a small gauge (thicker needle). On the contrary, short needles have a bigger gauge (thinner needles).

Small gauge (thick needle) is more appropriate for IM, and high gauge (thin needle) for SC.

Standard U-100 insulin syringe

The Standard U-100 insulin syringe can be used for small amounts, and can be particularly appreciated. It is suitable for subcutaneous injection as the needle is usually short. Short needle and high gauge (up to 30G) makes for nearly painless injection. The needle is attached to the syringe, which has pros and cons: the high gauge means it will take some time to draw the liquid from the vial(depening on the type of oil suspension used in your product), but it also means less hassle changing the needle, and less loss of product as dead space is reduced.

Dead space is the space from which the liquid drawn for the vial accumulates but cannot be injected. If dead space retains a tiny amount of liquid, in the long term of many injections, you might end up losing a few injections.

1 - Subcutaneous injections

Subcutaneous injection

A subcutaneous injection delivers the medicine into the layer of fat, between the skin and the muscle tissue. Absorption is slower than with IM, since vascularization of fatty tissues is limited. It is performed at a 45° to 80° angle. Needles are typically 25-30G and ½-⅝ inch long.

1 - SETTING UP

  • Clean your work area and assemble supply:

    • Medication in the vial
    • The syringes and two needles: one for drawing (18G), and one for injecting (25-30G; ½-⅝ inch), or an insulin U-100 syringe with attached needle (up to 30G)
    • Alcohol swab
    • Sharps container for disposal
  • Check the medication: expiry date, visible particles, discoloration…

  • Check the syringe package: do not use it if it is opened or damaged.

  • Wash your hands thoroughly.

2 - PREPARING THE DOSE

  • Clean the rubber stopper with the alcohol swab, and leave it untouched to dry.

  • Attach the 18G needle to the syringe, and remove the cover. (Skip if using Insulin U-100 syringe)

  • Draw air in the syringe, as much as the amount of medication you will inject.

  • Insert the needle through the center of the rubber stop into the bottle (vial is up, needle down), and inject the air into the bottle. This will create pressure that will help with drawing.

  • Turn the vial upside down, keeping the needing in the vial. Make sure the liquid covers the tip of the needle.

  • Slowly pull the plunger to fill the syringe with the medication, to a bit more than what you will inject.

  • Check for air bubbles, and tap with your fingers to have them go up the syringe. Slowly push the plunger to remove them, and reach the exact amount of medication you need to inject.

  • Pull the syringe and needle out of the vial, remove the 18G needle and replace it with the chosen injection needle. Remove the cap. (No change of needle if using Insulin U-100 syringe)

3 - SELECT AND PREPARE INJECTION SITE

4 - GIVE THE INJECTION

  • Clean the injection site with an alcohol swab; let it dry.
  • Hold the syringe with the hand you’ll use to give the injection, and with the other hand, pinch a fold of skin.
  • Insert the needle into the pinched zone, at a 45° angle, with on firm and quick motion. The shorter the needle is, the more you can vary between 45° and 90°. Leave away the hand holding the skin fold.
  • Proceed to injection by steadily pushing the plunger. Wait for 10 seconds after everything has been pushed in.
  • You may experience burning/pressure as you push in the medicine, especially with larger amounts.
  • Remove the needle and syringe from the skin and dispose of them in the sharps container.

TIPS TO REDUCE PAIN

  • Never reuse needles
  • Wait for the alcoolic solution you used to clean the injection spot to dry completely.
  • Using a drawing needle and an injection needle keep the second one perfectly sharp for injection, and can reduce pain.
  • Inject medicine at room temperature
  • Don’t hesitate when pushing the needle through the skin: be firm, steady and quick.
  • Avoid movement once inserted (moving back and forth, wiggling…)

2 - Intramuscular injections

Intramuscular injection

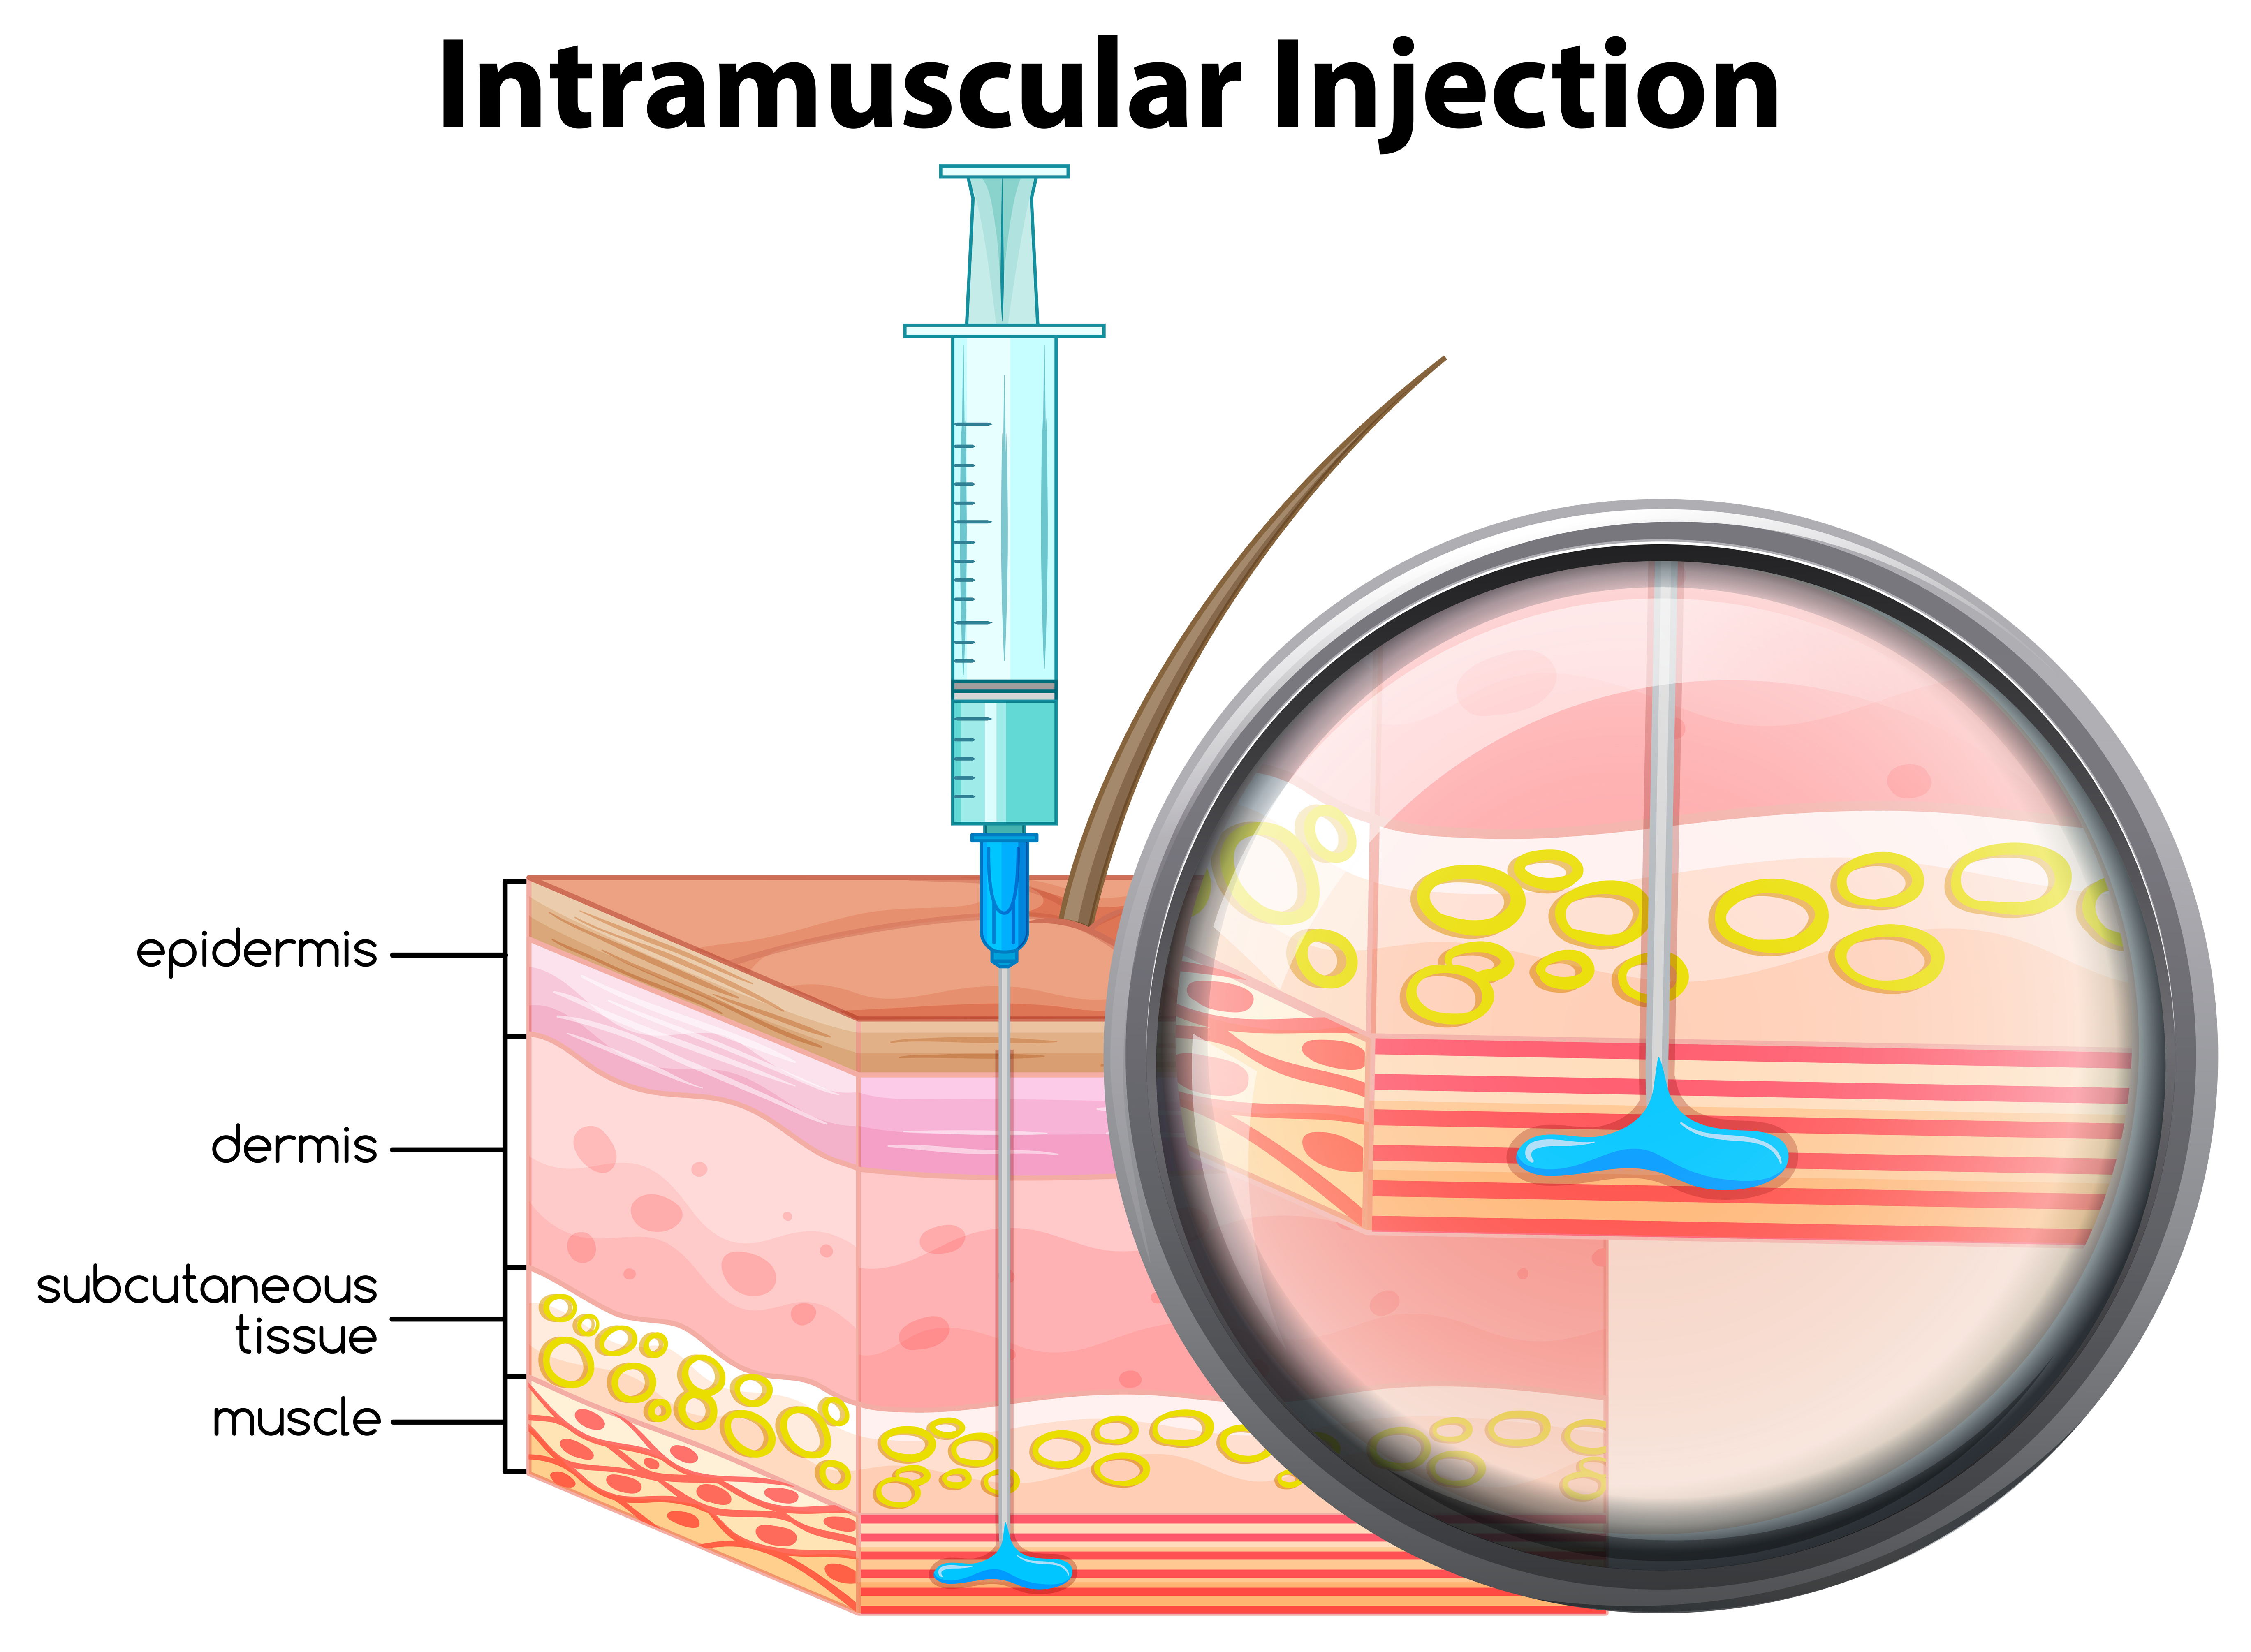
An intramuscular injection delivers medication deep into the muscle tissue. Being highly vascularized, the medication is absorbed quickly into the bloodstream.

IM are given at a 90° angle - that is, straight through the skin and fat layer, into the muscle. Needles are typically 20-23G, and 1-1.5 inch long. Take into consideration the layer of fat - if you are a bigger person, and depending on the site of injection, you might need to take a slightly longer needle.

1 - SETTING UP

  • Clean your work area and assemble supply:

    • Medication in the vial
    • The syringes and two needles: one for drawing (18G), and one for injecting (20-23G; 1-1.5 inch)
    • Alcohol swab
    • Sharps container for disposal
  • Check the medication: expiry date, visible particles, discoloration…

  • Check the syringe package: do not use it if it is opened or damaged.

  • Wash your hands thoroughly.

2 - PREPARING THE DOSE

  • Clean the rubber stopper with the alcohol swab, and leave it untouched to dry.
  • Attach the 18G needle to the syringe, and remove the cover.
  • Draw air in the syringe, as much as the amount of medication you will inject.
  • Insert the needle through the center of the rubber stop into the bottle (vial is up, needle down), and inject the air into the bottle. This will create pressure that will help with drawing.
  • Turn the vial upside down, keeping the needing in the vial. Make sure the liquid covers the tip of the needle.
  • Slowly pull the plunger to fill the syringe with the medication, to a bit more than what you will inject.
  • Check for air bubbles, and tap with your fingers to have them go up the syringe. Slowly push the plunger to remove them, and reach the exact amount of medication you need to inject.
  • Pull the syringe and needle out of the vial, remove the 18G needle and replace it with the chosen injection needle. Remove the cap.

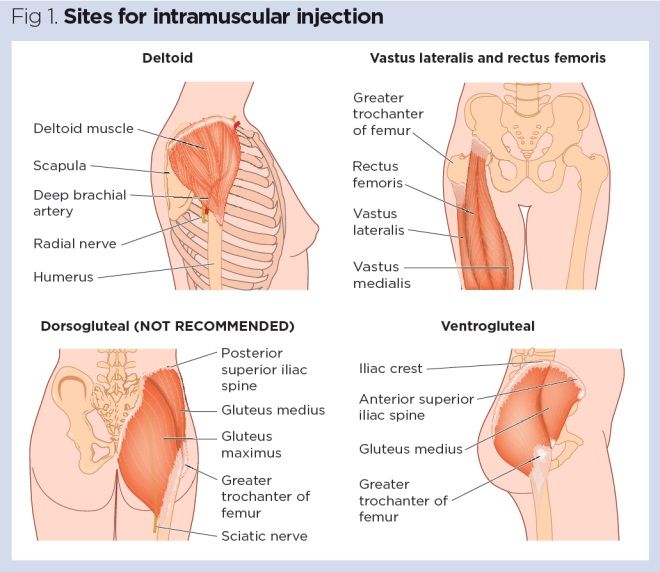
3 - SELECT INJECTION SITE

4 - GIVE THE INJECTION

  • Clean the injection site with an alcohol swab; let it dry.
  • Insert the needle into the muscle, at a 90° angle, with on firm motion.
  • Gently pull back the plunger to “draw”. If blood comes in the syringe, do not inject. Replace the needle and try again at a different site. If no not comes up, proceed to injection by steadily pushing the plunger. Wait for 10 seconds after everything has been pushed in.
  • You may experience burning/pressure as you push in the medicine, especially with larger amounts.
  • Remove the needle and syringe from the skin and dispose of them in the sharps container.
  • Gently press the alcohol swab on the injection site, and use band aid is needed.

TIPS TO REDUCE PAIN

  • Never reuse needles
  • Wait for the alcoolic solution you used to clean the injection spot to dry completely.
  • Using a drawing needle and an injection needle keep the second one perfectly sharp for injection, and can reduce pain.
  • Inject medicine at room temperature
  • Don’t hesitate when pushing the needle through the skin: be firm, steady and quick.
  • Insert the needle straight and avoid movement once inserted (moving back and forth, wiggling…)

3 - Vial coring and disposal of sharps

Vial coring and contamination

Vial coring is when a small piece of a vial’s rubber cap breaks off and gets into the vial itself and/or the fluid inside. This is generally caused by repeated insertion of needles through the vial cap. There is not much clear evidence about the risks of vial coring but potential issues include the possibility of drawing up and injecting small pieces of rubber. This is not necessarily dangerous but probably best avoided.

Another issue is that the hole in the vial cap may be large enough that it stays permanently open and allows air, dust and other contaminants to enter the vial. It may also allow fluid to leak out if the vial is not kept upright. Overall, while the risks associated with vial coring are not entirely clear, there are safeguards which are helpful and relatively easy to implement.

There are various steps which you can take to reduce the risk of vial coring:

  • After puncturing the cap of a new vial the first time you use it, it is generally advisable to reinsert the needle through the same hole for subsequent injections.
  • It can be helpful to use narrower gauge needles for drawing up medication. Depending on the carrier oil and viscosity of the HRT that you are using, it may be possible to use 25-30 gauge needles for drawing up.
  • After puncturing the cap of a new vial for the first time with a standard sharp drawing needle, you can use blunt drawing needles to draw up medication for subsequent injections. Using blunt needles will help prevent coring and also help prevent the risk of needlestick injuries.
  • When inserting needles through the vial cap you can use what is called the 45°-90° puncture technique. This involves inserting the needle at a 45–60° angle with the opening of the needle tip facing up (i.e. away from the stopper). As the needle enters the vial, a small amount of pressure is applied as you slowly increase the needle to a 90° angle. The needle should be at a 90° angle just as the needle bevel passes through the stopper. You can use 45–90° puncture technique both the first time you use the vial and for subsequent injections and you can also do this with both sharp and blunt needles.

Disposing of needles

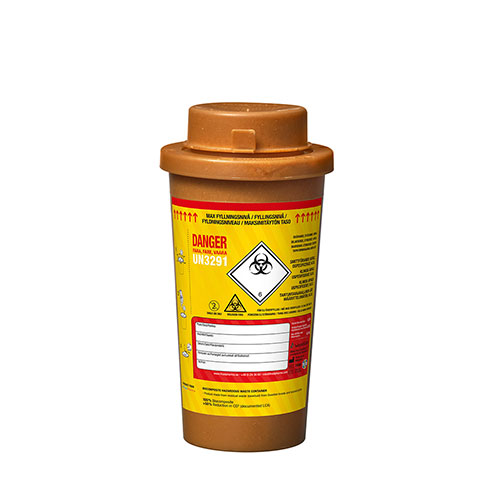
Never dispose of the needles in the household trash!

Pharmacies can dispense, free of charge, a safe box (sharps container) to dispose of syringes and needles. Once full, you can bring back the box to a pharmacy. They usually don’t ask any questions, and this won’t necessarily be seen as sketchy, as many people perform self-injection legally, especially insulin.